AN EXCELLENT SOLUTION FOR REPAIRS!
Cast partial repairs are a common task in many dental labs. Patients wearing these partials often loose supporting teeth, and clasps and extrusions break from adjustments or simply from metal fatigue.
Lab technicians add retention for teeth and add wrought wire clasps in a variety of methods. Sometimes, there is sufficient acrylic base where wires can be embedded. Occasionally, silver solder can be used for repairs, but this usually involves replacing all the teeth. Laser and phaser welding are an excellent method to add retention and clasps. Unfortunately, not every lab has access to these expensive welders.
EZ Partial Fix Advantages
- Saves time
- Cost effective
- Easy to use
- No need to solder or weld
- Can be used chair side
 The Partial Fix Technique describes an alternative, economical method to repair many types of cast partials.
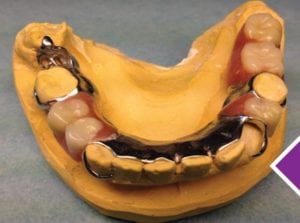
In this picture, the lower cast partial needs new teeth to replace #22 and #31 and needs clasps for #23 and #32. However, the partial still fits the patient well. An economical solution to repair this partial would be ideal.
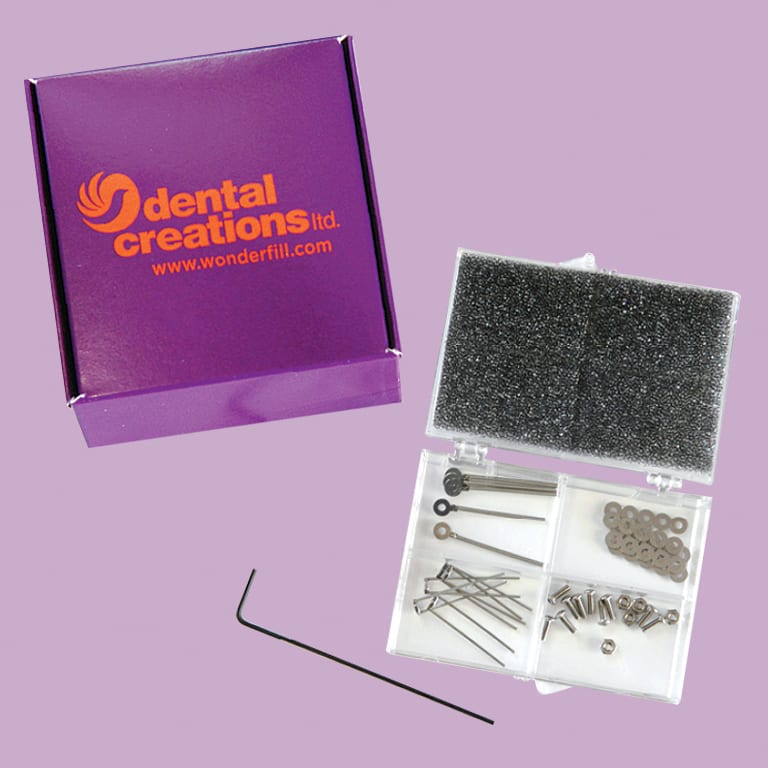
Repairs demonstrated below are made using the EZ Partial Fix Denture Repair Kit from Dental Creations, Ltd. This kit comes with an assortment of bolts, nuts, washer strings, and wires. Clasp and retention wires are already attached to washers and nuts. Bolt heads have a low profile that can be reduced even more if needed. A .050 hex driver is included to facilitate tightening. The kit contains parts for approximately 10 repairs.
Additional Useful Information About EZ Partial Fix Kit
DIRECTIONS
The Partial Fix Technique describes an alternative, economical method to repair many types of cast partials.
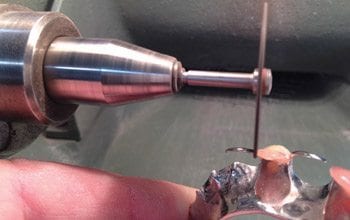
1. To begin the repair, the old clasp which engaged the now missing tooth #22 is removed.
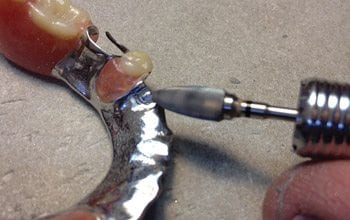
2. A flat surface is prepared on the lingual plate using a large carbide burr. Then a #4 carbide burr is used to drill a hole.
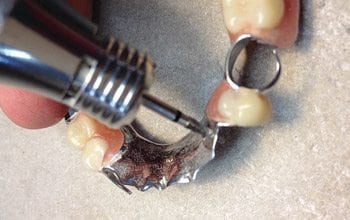
3. The hole is then enlarged using a tapered carbide drill.
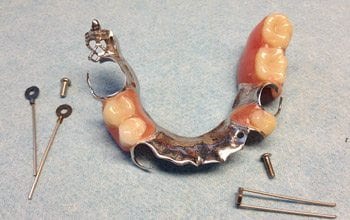
4. Fixation bolts, nuts, and washers with an attached clasp wire are selected.
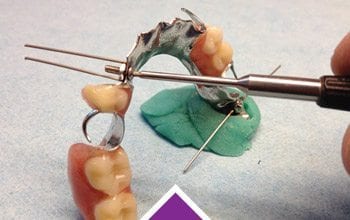
5. These are attached using a .050 hex driver. Note the low profile of the bolt head.
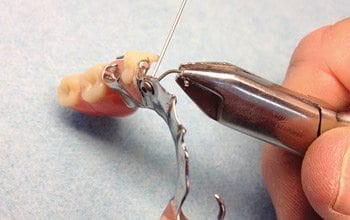
6. Three point clasp pliers are used to bend the clasp into the desired position. A retention loop is then made to support the new denture tooth.

7. Clasp wires are bolted to the mesh saddle area and then bent into position.
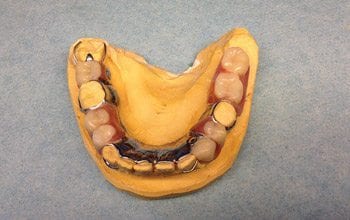
8. The partial is then seated back onto the model. New denture teeth are replaced using acrylic resin. If needed, bolt heads can be adjusted to an even lower profile.
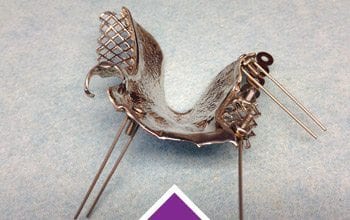
8a. Other types of repairs or modifications are possible using this kit in different combinations as shown above. Still another application of this system (not illustrated) is for the restoring dentist to add these to partials and apply composite intra-orally.
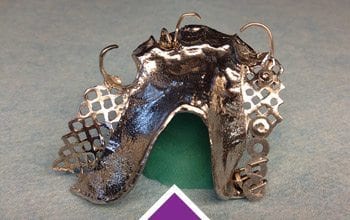
8b. The above picture shows a clasp and retention loop added to the lingual plate and a clasp added by bolting it to the cast mesh. Mesh is replaced by attaching a washer strip to the remaining mesh and a bolt with loops in the molar area.
FAQS
What type of burs and carbide drills are used in the article?
The instruments were purchased through Komet USA.
Fig. 4 – Bur H77UKHT023
Fig. 6; Fig. 7; Fig. 9 – Bur H138GTIHT023
Fig. 5; Fig. 8 – #4 Round Carbide
TECHNICAL ARTICLES

Bench Mastery: Make Partial Denture Repairs the EZ Way
– by Darrell Clark, CDT

